

Here is another educational blog post on VPS management brought to you by Mixal.
Connecting a domain to a Linux VPS is the digital equivalent of hanging a shingle outside your shop. It transforms your server from a cold, technical IP address into a destination that people can actually find and remember.
In this guide, we’re going to walk through three distinct ways to set up DNS in Linux: the straightforward method, the “hard mode” for total control, and the secure route using a proxy. Whether you are running a high-performance VPS NVME SSD or a standard setup, stick with me, and let’s get your domain talking to your server.
Read More:
Why Connect a Domain to a Virtual Server?
When you connect a domain to a Linux VPS, you are essentially registering your address in the Domain Name System (DNS). Think of DNS as the internet’s phonebook. It maps the human-readable name (your website) to the machine-readable IP address.
Without this connection, your web servers (like Apache or Nginx) are flying blind. They use “Virtual Hosting” to handle multiple sites on one server, relying on the domain name in the user’s request to know exactly which website to serve up.
Ways of Setting up a Domain on VPS
Prerequisites: What You Need Before We Start:
Before we dive into the “how-to,” let’s make sure your toolbox is ready. If you are using Canadian VPS hosting, you likely have most of this ready to go.
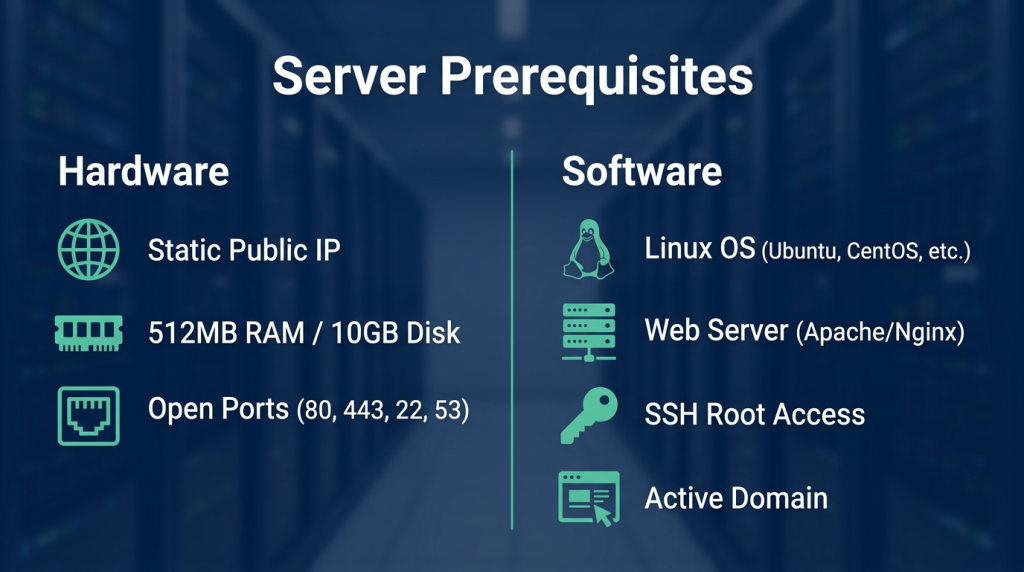
Hardware Requirements:
Static Public IP: Your Linux server needs a fixed address visible to the outside world.
Resources: For a basic site, you’ll want at least 512MB RAM, 10GB disk space, and a 1-Core CPU.
Network: Open ports are non-negotiable. You need Port 80 (HTTP), 443 (HTTPS), 22 (SSH), and 53 (DNS).
Software Reauirements:
Operating System(OS): Ubuntu 20.04+, CentOS 7+, Debian 10+, or AlmaLinux 8+.
Web Server: Apache, Nginx, or LiteSpeed installed.
Access: You need Root or Sudo access via SSH.
Domain: A registered, active domain. If you still need one, you can buy domain name Canada based registrars often recommend to ensure local relevance, or manage it directly through your hosting panel.
Now We dive into the methods:
Method 1: The A Record (The Direct Approach)
Connecting via an A Record (Address Record) is the bread and butter of DNS. It tells the internet, “When someone types example.com, send them to this specific IP address.”
Note: If you have previously connected your domain to a service like Cloudflare, your nameservers will point there. To use this method, you must ensure your nameservers are pointing to your registrar or hosting provider (like Mixal) to manage the records directly.
Step 1: Locate Your Server IP
First, grab your IPv4 address. You’ll find this in the welcome email you received after purchasing your server or inside your Mixal management panel. It looks something like 95.217.123.456. Copy it.
Step 2: Initial Domain Panel Configuration
- Head over to your domain management panel. We are going to set up a CDN connection first to handle the nameservers correctly within the Mixal ecosystem.
- Navigate to the CDN section in your menu.
- Click New CDN.
- Enter your domain name and select a plan (the free plan works fine for this). Click Buy and Continue.
- Click Configuration. You will see a set of Mixal nameservers. Copy these.
Now, go to the Domain menu, select Manage Domain, and then Nameservers. Paste the nameservers you just copied into the fields and hit Save. Wait a moment for the success message.
Back in the CDN menu, click Configuration again. Since the nameservers are now set, click Next Step until you reach the Records section.
Step 3: Creating the Records
We need to create two main records: one for the root domain and one for the www prefix.
1. The Root A Record:
Click Create New DNS.
Hostname: Enter @ or leave it blank (depending on the panel).
IP Address: Paste your VPS IP.
TTL (Time To Live): Default is usually fine.
Click Save.
2. The WWW CNAME Record:
Users are unpredictable; some type www, some don’t. We use a CNAME record so that www.example.com just points to your root domain. If you ever change your server IP, you only have to update the main A record, and the CNAME updates automatically.
Type: CNAME
Hostname: www
Target/Value: example.com
Click Save.
Step 4: Propagation and Testing
DNS changes aren’t instant. It’s called “propagation,” and it can take anywhere from a few minutes to 48 hours.
To test it, open your terminal (or CMD on Windows) and type:
ping example.com
If the reply comes from your server’s IP, you’re in business.
Method 2: The Power User Route (BIND)
This method provides total control by turning your VPS Linux server into its own nameserver. It removes the middleman, making your server the authority for your domain. This is ideal for IT managers or those reselling hosting.
Step 1: Install BIND
Connect to your server via SSH:
ssh username@server_ip
Once you’re in, update your package lists and install BIND9.
For Debian/Ubuntu:
sudo apt-get install bind9 bind9utils bind9-doc
For CentOS/RHEL:
sudo dnf install bind bind-utils -y
Step 2: Configure BIND
We need to tell BIND it’s in charge of your domain. Open the configuration file:
sudo nano /etc/bind/named.conf.local
Add the following zone block (replace example.com with your actual domain):
text
zone "example.com" {
type master;
file "/etc/bind/zones/example.com.db";
};
Press Ctrl+O to save and Ctrl+X to exit.
Next, create the directory for your zone files:
sudo mkdir /etc/bind/zones
Step 3: Create the Zone File
Now, we create the actual file that holds your records:
sudo nano /etc/bind/zones/example.com.db
Paste in the configuration below, replacing [Server_IP_Address] with your actual IP:
text
;
; BIND data file for example.com
;
$TTL 604800
@ IN SOA example.com. admin.example.com. (
2 ; Serial
604800 ; Refresh
86400 ; Retry
2419200 ; Expire
604800 ) ; Negative Cache TTL
;
@ IN NS example.com.
@ IN A [Server_IP_Address]
www IN A [Server_IP_Address]
Save and exit. Then, restart BIND to apply changes:
sudo systemctl restart bind9
Step 4: Registers Nameservers (Glue Records)
Now you need to tell the rest of the world that your server is the nameserver.
Log into your Mixal panel.
Go to Domains -> Manage Domain -> Nameservers.
You need to create Glue Records. Since your nameservers (e.g., ns1.example.com) are part of the domain itself, the registry needs to know their IP.
In the Mixal panel (under CDN configuration or specific Glue Record settings depending on the interface), create two A records:
Host: ns1 -> Value: Your Server IP
Host: ns2 -> Value: Your Server IP
Once these are set, point your domain’s main nameservers to ns1.example.com and ns2.example.com.
Method 3: Cloudflare (Secure & Fast)
This is often the preferred method for modern Canada web hosting setups. Cloudflare acts as a proxy, sitting between your users and your server. It hides your real IP and provides a massive global CDN.
Step 1: Create an Account
Head to cloudflare.com and sign up. It’s free and quick.
Step 2: Add Your Site
Enter your domain name. Select the Free Plan to start. Cloudflare will automatically scan for your existing DNS records.
Step 3: verify Records
Ensure you have the following records in the Cloudflare dashboard:
A Record: Name @, IPv4 Your_Server_IP.
CNAME Record: Name www, Target example.com.
Note on Proxy Status: If the little cloud icon is orange (Proxied), Cloudflare is protecting your site. If it’s grey, it’s DNS-only (direct connection). For security, keep it orange.
Step 4: Update Nameservers
Cloudflare will give you two nameservers, like sara.ns.cloudflare.com.
Go back to your Mixal domain panel, navigate to Nameservers, and replace your existing ones with these two new addresses.
Step 5: SSL Configuration
In Cloudflare, go to the SSL/TLS tab. Set the mode to Flexible if you don’t have an SSL certificate on your server yet. Once you install Let’s Encrypt on your VPS, switch this to Full (Strict) for better security.
Pro-Tips for a Smooth Connection
Check the Firewall: It’s a classic mistake. You set up DNS perfectly, but your firewall blocks port 80. Ensure your vps server wordpress or standard Linux box allows HTTP/HTTPS traffic.
Don’t Forget Email: If you use email hosting canada or services like Gmail/Zoho, make sure you copy your MX records to your new DNS panel. If you miss this, your email will stop working instantly.
Lower TTL: Before making changes, lower your TTL (Time To Live) to 300 seconds. This helps changes propagate faster.
Conclusion
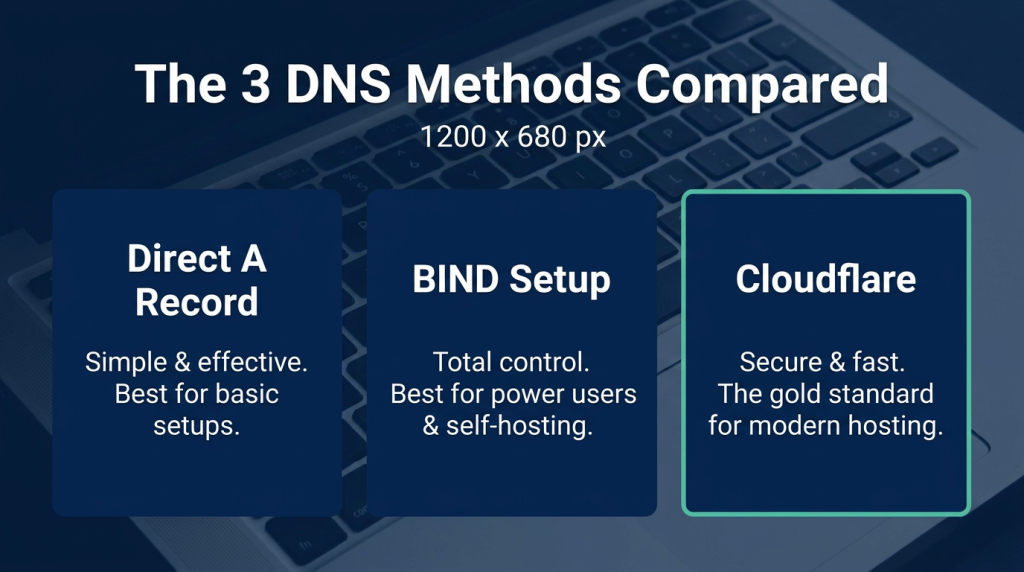
We covered three paths:
Direct A Record: Simple and effective.
BIND: For the hands-on expert requiring a dedicated vps level of control.
Cloudflare: The best balance of security and speed.
For most users, especially if you are looking for robust vps hosting in canada, combining your server with Cloudflare (Method 3) is the gold standard. It protects your infrastructure while delivering content at lightning speed.
Ready to upgrade your infrastructure? Check out Mixal’s range of high-performance hosting solutions.
Frequently Asked Questions (FAQ)
1. What is the safest way to connect my domain?
Using Cloudflare (Method 3) is generally the safest. It hides your server’s real IP address and provides a firewall against DDoS attacks.
2. Which method is best for beginners?
Method 1 (A Record) is the simplest. You just point the name to the number, and you are done.
3. Can I switch methods later?
Absolutely. You can switch from direct DNS to Cloudflare at any time simply by updating your nameservers.